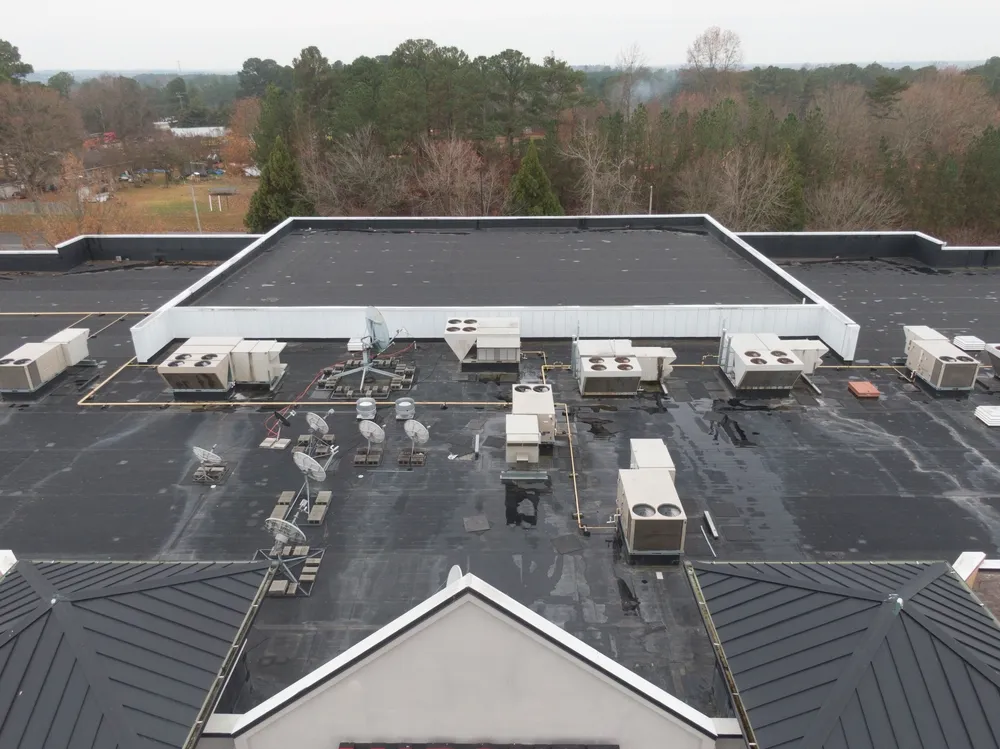
Understanding epdm roofing installation details is essential before installing, replacing, or evaluating an EPDM flat roof. EPDM, short for ethylene propylene diene monomer, is a synthetic rubber roofing membrane used across many commercial and residential low-slope applications. However, long-term performance depends on much more than simply covering a roof deck with rubber membrane.
A successful installation requires careful evaluation of the existing roof, a clean and stable substrate, compatible insulation and cover board, an attachment method suited to the building, properly prepared seams, secure flashing, effective drainage, robust perimeter details, and thorough quality control. Manufacturer requirements also matter because adhesive application, primer use, seam dimensions, flashing configurations, and fastening patterns can vary by system.
Property owners researching epdm roofing installation details should therefore treat EPDM as a complete roof assembly rather than a standalone sheet of membrane. The EPDM Roofing Association recognizes ballasted, fully adhered, and mechanically attached configurations as established installation approaches, with system selection depending on the roof and project requirements.
What Is an EPDM Roofing System?
Before examining epdm roofing installation details, it helps to understand what the membrane does within the complete roof assembly. EPDM serves as the primary weather-resistant layer, but its performance is closely connected to the roof deck, insulation, attachment components, seams, flashings, drainage, and perimeter securement beneath and around it.
EPDM Is a Single-Ply Rubber Membrane
EPDM is a flexible synthetic rubber membrane manufactured for low-slope roofing applications. Depending on the selected system, membrane sheets may be nonreinforced, reinforced, black, white, or manufactured in different thicknesses and configurations.
One practical advantage of EPDM is that large sheets can reduce the total number of field seams on suitable projects. Fewer seams can simplify portions of the layout, but every remaining seam, penetration, edge, and transition still requires accurate preparation and installation.
Unlike TPO and PVC, EPDM is not typically joined by hot-air welding. EPDM systems commonly use manufacturer-approved primers, tapes, adhesives, and accessories to form seams and details. The exact method should follow the specifications for the membrane manufacturer and system being installed.
The Membrane Is Only One Part of the Roof
A commercial or residential EPDM roof may include the structural deck, vapor-control components where required, thermal insulation, tapered insulation, cover board, attachment components, membrane, seam materials, perimeter securement, drains, scuppers, flashing, and accessories.
This layered approach is important because a premium membrane cannot compensate for a weak deck, wet insulation, poor drainage, loose attachment, or incorrectly built flashing. A roof should be designed and installed as an integrated assembly rather than as unrelated products placed on top of one another.
Start With a Detailed Roof Assessment
Good epdm roofing installation details begin before membrane arrives at the jobsite. The existing roof, structural deck, moisture condition, drainage pattern, rooftop equipment, access limitations, and intended building use should be evaluated so the proposed assembly addresses actual conditions rather than relying on assumptions.
Inspect the Existing Roof and Deck
The contractor should look for active leaks, soft areas, deteriorated decking, corrosion, rot, loose components, damaged insulation, ponding water, failed flashing, open seams, and evidence of previous repairs. On a replacement project, the existing roof history can help identify recurring problems that a new assembly should correct.
Deck type also affects installation planning. Steel, concrete, wood, gypsum, and other substrates do not automatically use the same attachment methods. Fastener selection, pullout resistance, adhesives, attachment density, and preparation requirements may vary.
If the deck is deteriorated, installing new insulation and EPDM over it can transfer old weaknesses into the replacement roof. Damaged areas should be addressed before the new assembly conceals them.
Determine Whether Moisture Is Trapped Below the Surface
An existing membrane may look relatively intact while insulation underneath is wet. Water can migrate laterally through insulation joints and roof layers, so an interior stain does not always show the precise point of entry.
Depending on project conditions, contractors may use visual inspection, test cuts, moisture surveys, infrared evaluation, or other appropriate methods to investigate the assembly. Wet or deteriorated materials should not automatically be covered simply to reduce tear-off costs.
The objective is to understand what can remain and what must be removed. A recover system can be appropriate in certain circumstances, but only when existing conditions, applicable requirements, compatibility, and system design support that decision.
Prepare the Roof Deck and Substrate Correctly
Substrate preparation is one of the most important epdm roofing installation details because every layer above the deck depends on a sound foundation.
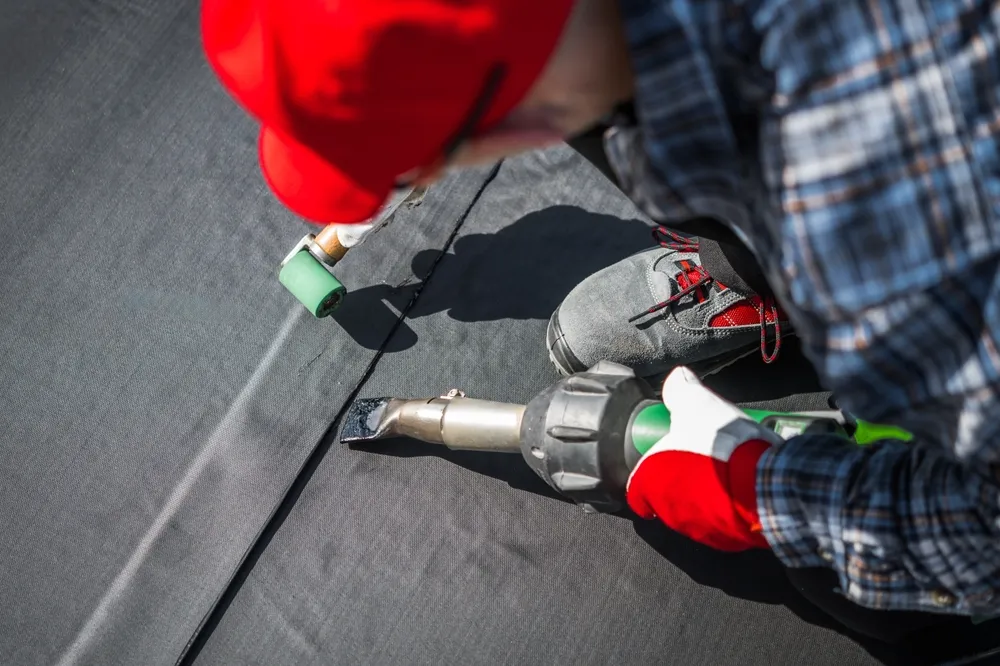
A dirty, wet, uneven, unstable, or contaminated surface can interfere with insulation attachment, adhesive performance, membrane appearance, and long-term durability.
Create a Clean, Dry, Stable Installation Surface
Loose debris, sharp objects, abandoned fasteners, oil, standing water, and incompatible materials should be removed before new roofing components are installed. Protrusions can place concentrated stress on the membrane, while contamination can interfere with adhesives and primers.
The surface should also be evaluated for irregularities. Significant gaps, unsupported transitions, damaged boards, and abrupt changes in plane can eventually telegraph through the roof assembly or create stress points.
Preparation requirements should be based on the selected system rather than a generic checklist. A fully adhered membrane, for example, places particular importance on the condition and compatibility of the bonding surface.
Correct Structural and Surface Defects Before Covering Them
Roof replacement is the right time to address deteriorated decking, unstable sections, incorrectly abandoned openings, and other defects that would become hidden later. Simply bridging a problem with insulation does not make the underlying structure sound.
Transitions between different substrates also need attention. When a roof addition, deck repair, expansion area, or change in construction creates movement, the detail may need specific treatment rather than an ordinary membrane patch.
A disciplined contractor documents these conditions and resolves them before proceeding. That approach protects the new roof from inheriting preventable problems.
Choose the Correct EPDM Installation Method
The attachment method is central to epdm roofing installation details because EPDM systems may be fully adhered, mechanically attached, or ballasted. Each approach has distinct structural, wind, labor, weight, and detailing considerations, so the method should be selected for the building rather than chosen solely by price.
Fully Adhered EPDM Systems
A fully adhered system bonds the membrane to an approved substrate using a compatible attachment technology or adhesive system. This approach can create a smooth appearance and limit broad membrane movement because the sheet is secured across the field of the roof.
Successful installation depends on proper adhesive application, substrate compatibility, weather conditions, membrane positioning, and the manufacturer’s instructions. Depending on the product, installation may involve traditional bonding adhesive, low-rise foam adhesive systems, or self-adhering technologies.
A fully adhered roof is not simply a matter of “adding more glue.” Coverage rates, open time, substrate porosity, contamination, temperature, and application technique can materially affect the result. Carlisle’s official fully adhered EPDM system information provides an example of manufacturer-specific system guidance.
Mechanically Attached EPDM Systems
Mechanically attached systems use approved fasteners, plates, battens, or system-specific attachment configurations to secure roofing components to the underlying deck. Attachment patterns must account for deck conditions, wind pressures, building geometry, and the selected assembly.
Perimeters and corners can experience different wind pressures from the central roof field, so fastening requirements may change by roof zone. This is one reason a generic “fastener every few feet” approach is not an acceptable substitute for a properly designed system.
The EPDM Roofing Association describes mechanically attached configurations using membrane panels and attachment to the underlying deck, while emphasizing that different membrane configurations may be selected according to project needs.
Ballasted EPDM Systems
In a ballasted assembly, the EPDM membrane is generally loose-laid over an approved substrate and held in place by ballast such as smooth stone or approved pavers according to the system design. This method can provide efficient coverage on suitable buildings.
The additional weight means structural capacity must be evaluated. Drainage, wind conditions, roof height, perimeter conditions, ballast distribution, and future maintenance access also matter. A ballasted design should not be selected merely because it may reduce certain attachment steps.
Manufacturer specifications can contain highly specific requirements for membrane thickness, underlayment, relaxation, substrate conditions, and ballast. Carlisle, for example, publishes a dedicated loose-laid ballasted EPDM guide specification rather than treating it as interchangeable with an adhered assembly.
Install Insulation and Cover Board as Part of the Roof System
Insulation is a major part of epdm roofing installation details because it influences thermal performance, membrane support, drainage opportunities, attachment, and the overall roof profile. Cover boards may add durability and create a stronger surface beneath the membrane where the assembly calls for them.
Install Insulation With Tight, Stable Joints
Insulation boards should be positioned according to the roof design and applicable system requirements. Boards should sit securely without rocking, large unsupported gaps, or unstable edges. Multiple layers may be installed with joints offset where specified to improve continuity and reduce aligned pathways through the assembly.
Attachment may involve fasteners and plates, approved adhesives, or another system-specific approach. The correct method depends on the deck, insulation product, membrane assembly, wind design, and other project conditions.
Careful insulation work creates a more consistent surface for the layers above. Poorly fitted boards can contribute to movement, uneven surfaces, membrane stress, and difficulties around transitions.
Use Cover Board Where the Assembly Benefits From Added Protection
A cover board can provide a stronger working surface above insulation and may improve resistance to impacts or concentrated rooftop traffic, depending on the selected product and system. Commercial roofs with frequent HVAC service, maintenance access, or other rooftop activity may particularly benefit from a thoughtfully designed protective layer.
Cover board can also provide a suitable substrate for certain adhered membrane configurations. Product compatibility and attachment still need to follow system requirements rather than assumption.
Lay Out and Position EPDM Membrane Carefully
Membrane positioning is a practical part of epdm roofing installation details that directly affects seams, wrinkles, penetrations, roof edges, and installation efficiency.
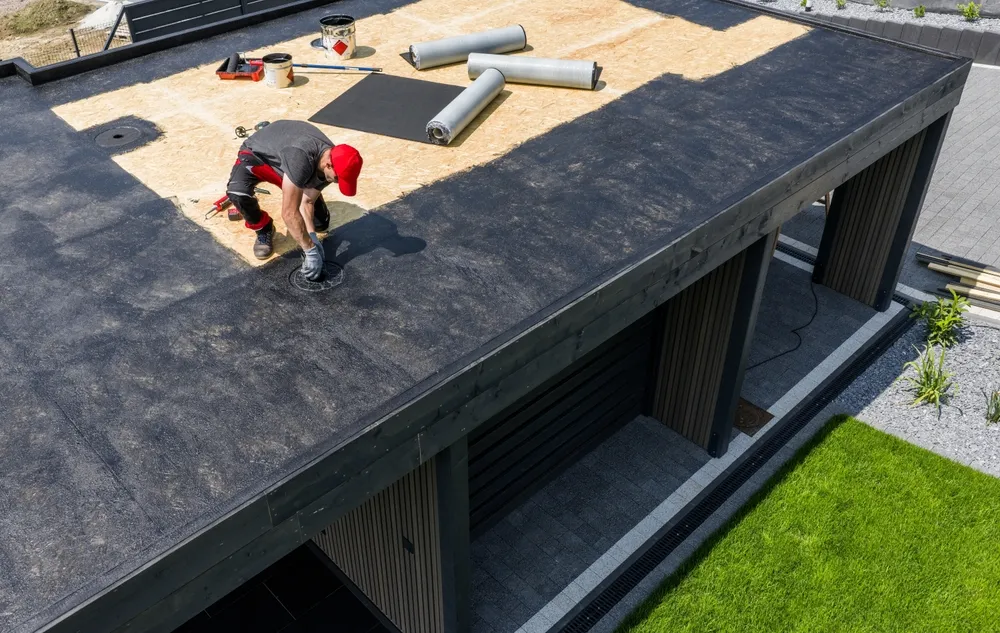
Careful planning before bonding or fastening helps reduce unnecessary field adjustments later.
Plan Sheet Layout Before Permanent Attachment
The installer should evaluate roof dimensions, penetrations, walls, drains, curbs, and planned seam locations before permanently securing the membrane. Good layout can reduce unnecessary small pieces and avoid placing awkward seams where detailing is already complex.
Large membrane sheets must be handled safely, especially in wind. Crews need enough control to position the material without dragging it over sharp objects or allowing uncontrolled movement near roof edges.
The membrane should also remain clean. Jobsite dirt, oils, moisture, and construction debris can complicate later seam preparation and flashing work.
Allow the Membrane to Relax When the System Requires It
Depending on the membrane and manufacturer instructions, sheets may need time to relax after positioning and before final installation. Relaxation can help reduce packaging wrinkles and make accurate placement easier.
The exact duration should come from the applicable technical requirements, not a universal rule repeated from another product.
Once positioned correctly, the crew can proceed with the selected attachment method while controlling wrinkles and maintaining alignment.
Build EPDM Seams With Careful Surface Preparation
Seams are among the most critical epdm roofing installation details because they create watertight transitions between membrane sheets. A seam can appear closed at first while still being vulnerable if the surface was contaminated, primer application was inconsistent, or pressure was not applied properly.
Clean and Prepare the Seam Area
The adjoining membrane surfaces should be prepared according to the system manufacturer. The process may involve cleaning, marking the overlap, applying specified primer, allowing required flash-off conditions, and positioning approved seam tape or adhesive.
Dust and contamination can compromise bonding. Moisture can also create problems. Crews should not treat seam preparation as a quick cosmetic step because the bond develops through correct material contact and installation procedure.
Roll and Inspect Completed Seams
After the seam is assembled, pressure should be applied using the tool and method required by the system. The installer should inspect for wrinkles, fishmouths, contamination, incomplete contact, and other irregularities.
Quality control is easier when inspection occurs as the work progresses. Waiting until the end of a large project can make it harder to identify where a crew changed procedures or encountered unusual conditions.
Seams at intersections and transitions deserve particular attention because multiple layers can create complex geometry. Manufacturer-specific details should guide these conditions.
Flash Walls, Curbs, Pipes, and Other Penetrations Properly
Field membrane may cover most of the roof area, but flashing details often determine whether water stays out. Strong epdm roofing installation details must address parapets, walls, HVAC curbs, vent pipes, drains, skylights, equipment supports, and every other interruption in the continuous roof surface.
Build Wall and Parapet Flashing for Movement and Water Control
At walls and parapets, the membrane typically needs to transition from the horizontal roof field to a vertical surface. The detail must accommodate the geometry, building movement, termination method, and weather exposure.
Depending on the system, the assembly may incorporate membrane attachment, termination bars, counterflashing, coping, sealants, or other approved components. Simply extending loose membrane a short distance up a wall is not a complete flashing design.
Changes in plane can also experience stress. The correct detail should follow the roof-system manufacturer and project documents.
Use Compatible Materials Around Pipes and Curbs
Penetrations interrupt the continuous membrane, which is why compatible accessories and carefully formed flashing are necessary. Depending on the condition, installers may use molded boots, uncured EPDM flashing, primer, tapes, sealants, and other approved components.
A generic tube of sealant should not be expected to replace a complete flashing assembly. Sealant can be an important component within a designed detail, but relying on exposed caulk alone around moving penetrations often creates a maintenance problem.
Plan for Rooftop Traffic and Future Maintenance
Another frequently overlooked part of epdm roofing installation details is what happens after the crew leaves.
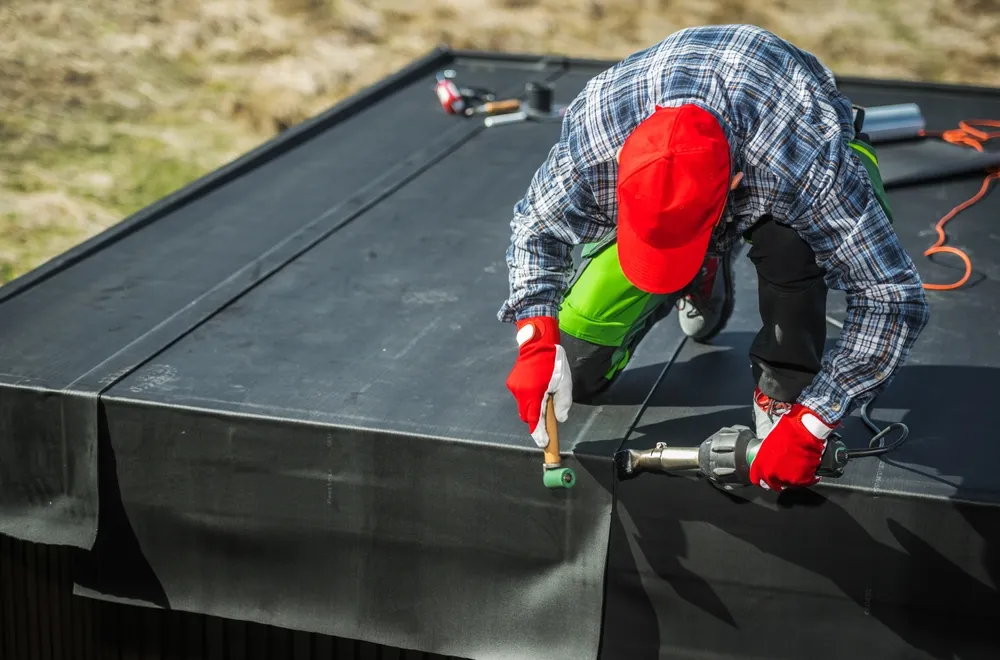
Commercial roofs may be accessed repeatedly by HVAC contractors, electricians, plumbers, telecommunications installers, maintenance teams, and other trades, while residential flat roofs may also need periodic access for drains, equipment, or inspection.
Protect High-Traffic Routes
Repeated foot traffic can place concentrated wear on membrane areas between access points and rooftop equipment. Where appropriate, walkway products or designated paths can help direct traffic and protect vulnerable sections of the roof.
The best routes should be considered during installation rather than after damage appears. Contractors can identify where technicians are likely to walk between roof hatches, ladders, HVAC units, drains, and service areas.
Protection should use compatible products installed according to the roofing system requirements. Random mats or materials placed on the roof can trap debris, interfere with drainage, or react poorly with the membrane.
Keep Future Repairs in Mind During Layout
Roof components should remain reasonably accessible for inspection and service. Drains should not be hidden behind unnecessary obstacles, and critical flashing areas should be inspectable.
Property managers should also control who accesses the roof. Dropped screws, sharp tools, removed equipment, and unauthorized penetrations can damage a membrane long after installation.
The internal commercial roof maintenance checklist provides a practical framework for managing the roof after construction without overloading the article with repeated internal links.
Follow Roof Safety Requirements Throughout Installation
Safety is a non-negotiable part of epdm roofing installation details. Low-slope roofs may look easier to work on than steep roofs, but unprotected edges, skylights, roof openings, ladders, wet surfaces, wind, tools, and material handling create significant hazards.
Plan Fall Protection Before Work Starts
Roof safety should be planned before crews begin removing or installing materials. Applicable fall-protection methods depend on work conditions and regulatory requirements.
For construction roofing work on low-slope roofs with unprotected sides and edges six feet or more above lower levels, OSHA specifies permitted fall-protection systems and combinations of systems. Contractors and employers should review the current OSHA fall protection requirements and apply them to actual job conditions.
Safety planning should also address access, rescue considerations, weather changes, material storage, and work around skylights or other openings.
Secure Materials and Maintain Organized Work Areas
Large membrane sheets can become difficult to control in wind. Insulation boards, packaging, tools, and other lightweight materials can also move unexpectedly on an exposed roof.
A well-managed jobsite keeps access paths clear, controls debris, stores materials safely, and prevents loose objects from entering drains or damaging newly installed membrane.
Organization contributes to workmanship as well as safety. A cleaner work area reduces the chance of trapping debris beneath the membrane or leaving sharp objects on the completed roof.
Inspect the Finished EPDM Roof Before Completion
Quality control confirms whether the epdm roofing installation details shown in plans and specifications were actually executed on the roof. Final inspection should be systematic and should focus heavily on seams, edges, drains, penetrations, transitions, flashing, and areas exposed to construction traffic.
Check Seams and Flashing Closely
Completed seams should be inspected for irregularities, incomplete contact, wrinkles, fishmouths, contamination, and other visible concerns. Flashing around pipes, curbs, walls, drains, and penetrations deserves the same level of scrutiny.
Small workmanship issues are easier to correct before demobilization than after an interior leak develops. The inspection should therefore be an active quality-control process rather than a quick walk across the roof.
Carlisle publishes an EPDM rooftop inspection checklist specifically to help illustrate inspection requirements and common roof details, reinforcing the value of a structured review.
Verify Drainage, Cleanup, and Roof Condition
The completed roof should be free of construction debris, abandoned fasteners, packaging, and unnecessary materials. Drains and scuppers should be open, and water pathways should not be obstructed by leftover materials.
Inspectors should also look for damage caused by other trades during the project. An EPDM installation can be completed correctly and then punctured by subsequent mechanical or electrical work.
Project documentation may include photographs, product information, warranty records, maintenance expectations, and other records appropriate to the scope.
Decide Whether Existing EPDM Needs Repair or Full Replacement
Not every EPDM problem requires a new roof.
A complete understanding of epdm roofing installation details also helps property owners distinguish an isolated repair from widespread system deterioration that may justify replacement.
Repair May Be Appropriate for Localized Damage
An otherwise serviceable EPDM roof may be repairable when the problem is limited to a puncture, isolated open seam, damaged flashing detail, small area of contamination, or specific penetration issue.
The repair should use compatible materials and address the cause. Covering a puncture without understanding whether water has saturated surrounding insulation can leave hidden damage in place.
A professional inspection should evaluate the area beyond the visible defect because water movement may extend farther than expected.
Replacement May Be Better for Widespread Failure
Replacement may offer better long-term value when the roof has widespread seam deterioration, extensive wet insulation, repeated leaks, significant drainage problems, broad membrane damage, or multiple failing details.
The decision should also consider roof age, deck condition, repair history, energy goals, and future building plans. Single Ply Roofing Experts’ guide to commercial roofing repair or replacement provides additional context for owners weighing those options.
A replacement project can address underlying insulation, drainage, and flashing conditions that isolated patches cannot correct.
FAQ
These concise answers address common questions about epdm roofing installation details for commercial and residential flat roofs.
What Are the Most Important EPDM Roofing Installation Details?
The most important details include substrate preparation, insulation attachment, membrane layout, system attachment, seams, flashing, drains, perimeter securement, weather planning, and final quality control.
Is EPDM Fully Adhered or Mechanically Attached?
EPDM can be fully adhered, mechanically attached, or installed in a ballasted system. The correct method depends on the roof deck, building design, wind conditions, structural capacity, and selected manufacturer system.
Can EPDM Be Installed Over an Existing Roof?
Sometimes. The existing assembly must be evaluated for moisture, deterioration, compatibility, code considerations, structural conditions, and suitability for a recover application.
How Are EPDM Roof Seams Joined?
EPDM seams commonly use manufacturer-approved primers, seam tapes, adhesives, and related accessories. The exact preparation and installation method depends on the roofing system.
Does an EPDM Roof Need Insulation?
Many EPDM assemblies include roof insulation for thermal performance and system design. The exact insulation type and thickness depend on the building, applicable requirements, deck, climate, and roof assembly.
Can EPDM Be Installed on a Residential Flat Roof?
Yes. EPDM can be suitable for certain residential low-slope roofs, additions, garages, and other flat roof areas when the complete assembly is properly designed and installed.
What Causes EPDM Installation Failures?
Common contributors include poor surface preparation, contaminated seams, incompatible products, incorrect adhesive application, weak flashing, inadequate drainage, poor perimeter securement, and damage from later rooftop traffic.
Should EPDM Be Installed by a Professional?
Professional installation is generally the prudent choice for complete roof systems because deck conditions, attachment, seams, flashing, drainage, safety, and manufacturer-specific requirements all affect performance.
How Often Should an EPDM Roof Be Inspected?
Inspection frequency should reflect the building, roof system, warranty conditions, climate, and exposure, with additional checks commonly appropriate after severe storms, suspected damage, leaks, or significant rooftop work.
Conclusion
EPDM roofing installation details determine whether a flat roof functions as a coordinated waterproofing system or develops avoidable problems around seams, drainage points, edges, and penetrations. Reliable installation begins with a thorough roof assessment and stable substrate, then continues through compatible insulation, an appropriate attachment method, careful membrane positioning, disciplined seam preparation, robust flashing, effective drainage, perimeter securement, safety planning, and final quality control. Manufacturer-specific requirements should guide the actual installation because EPDM products and assemblies are not universally interchangeable.
Single Ply Roofing Experts helps commercial and residential property owners evaluate, install, repair, replace, and maintain flat roofing systems based on real building conditions. Whether a property needs an EPDM roof, leak investigation, drainage improvement, insulation work, targeted repair, or a complete low-slope roof replacement, our team can assess the system and recommend a practical path forward. To discuss a commercial or residential flat roofing project, reach out through the Single Ply Roofing Experts contact page and start with a professional evaluation of your roof.